Why Make This Recipe
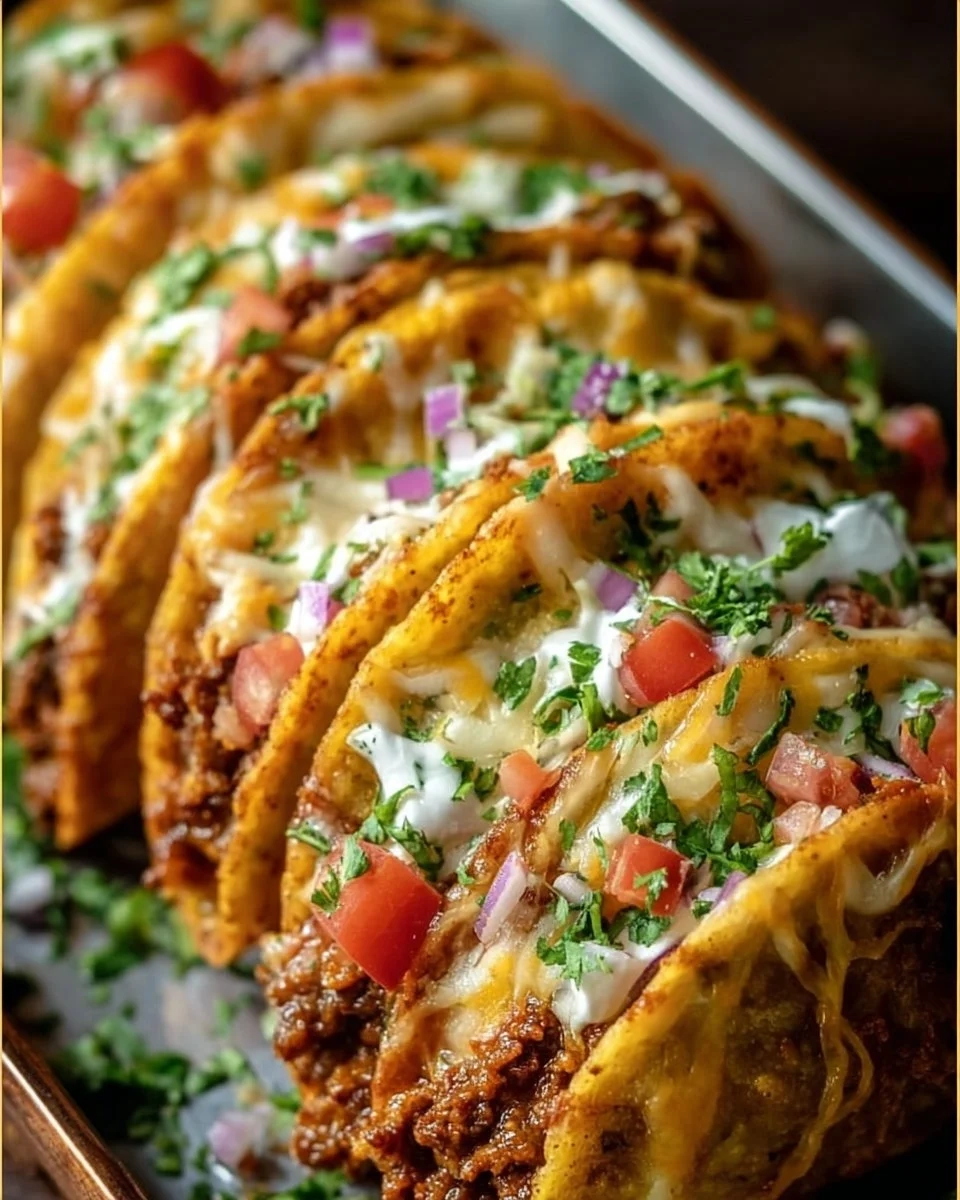
Oven-Baked Cheesy Tacos are the ultimate comfort food! They are easy to make, fun to eat, and perfect for any occasion, from family dinners to game days. With crispy shells filled with seasoned beef and melted cheese, everyone will love them. Add your favorite toppings for extra flavor, making these tacos a hit with both kids and adults.
How to Make Oven-Baked Cheesy Tacos
Ingredients
- 1 lb (450 g) ground beef
- 1 small onion, finely diced
- 2 cloves garlic, minced
- 1 packet taco seasoning (or homemade mix)
- ⅔ cup tomato sauce or salsa
- Salt & pepper to taste
- 8 hard taco shells
- 2 cups shredded cheese (cheddar, Monterey Jack, or Mexican blend)
- 1 cup shredded lettuce
- ½ cup diced tomatoes
- ¼ cup diced red onion
- 2 tablespoons chopped cilantro (optional)
- Sour cream (optional)
- Guacamole (optional)
- Jalapeño slices (optional)
- Hot sauce (optional)
Directions
- Preheat Oven: Heat the oven to 400°F (200°C). Arrange the taco shells upright in a baking dish.
- Cook Beef Mixture: In a skillet over medium heat, cook the ground beef and diced onion until browned. Drain any excess fat. Then, add the minced garlic and taco seasoning, stirring for about 1 minute. Pour in the tomato sauce and let it simmer for 5 minutes.
- Assemble Tacos: Spoon the seasoned beef mixture evenly into each taco shell. Sprinkle shredded cheese generously on top of the beef.
- Bake: Place the baking dish in the oven and bake for 10–15 minutes, or until the cheese is melted and the taco shells are crisp and golden.
- Add Fresh Toppings: Remove from the oven and top the tacos with shredded lettuce, diced tomatoes, red onion, and cilantro. Serve warm with sour cream or guacamole.
How to Serve Oven-Baked Cheesy Tacos
These delicious tacos are best served warm. Put them on a big platter and let everyone add their favorite toppings like sour cream, guacamole, jalapeños, or hot sauce. This way, everyone can customize their tacos to their liking.
How to Store Oven-Baked Cheesy Tacos
If you have leftovers, let the tacos cool down before storing them. Place them in an airtight container in the refrigerator for up to 2 days. To reheat, pop them back in the oven at 350°F (175°C) until heated through. Note that the shells may lose some crispness.
Tips to Make Oven-Baked Cheesy Tacos
- Use lean ground beef to cut down on fat. You can also try ground turkey or chicken for a healthier option.
- Don’t overstuff the taco shells; they should be filled just enough to hold together but not bursting.
- Experiment with different cheese blends to find your favorite combination.
- For extra spiciness, add chopped jalapeños to the beef mixture or as a topping.
Variations
You can switch things up by using different proteins like shredded chicken, beef, or even vegetarian alternatives such as black beans or lentils. You can also customize the toppings to suit your taste; try adding olives, corn, or avocado slices.
FAQs
Can I use soft taco shells instead of hard?
Yes, you can use soft taco tortillas. Just be aware that the cooking time may vary, and they won’t have the same crispy texture that hard shells provide.
Can I freeze the assembled tacos?
It’s best to freeze the filling instead of assembled tacos. You can prepare the filling in advance, freeze it, and then fill the taco shells and bake them when you’re ready to eat.
What can I serve on the side?
These tacos go well with a side of Mexican rice, beans, or a fresh salad. You can also serve them with nachos or chips and salsa for a fun, festive meal!
Print
Oven-Baked Cheesy Tacos
Delicious oven-baked tacos filled with seasoned beef and melted cheese, perfect for any occasion.
- Total Time: 35
- Yield: 4 servings 1x
Ingredients
- 1 lb (450 g) ground beef
- 1 small onion, finely diced
- 2 cloves garlic, minced
- 1 packet taco seasoning (or homemade mix)
- ⅔ cup tomato sauce or salsa
- Salt & pepper to taste
- 8 hard taco shells
- 2 cups shredded cheese (cheddar, Monterey Jack, or Mexican blend)
- 1 cup shredded lettuce
- ½ cup diced tomatoes
- ¼ cup diced red onion
- 2 tablespoons chopped cilantro (optional)
- Sour cream (optional)
- Guacamole (optional)
- Jalapeño slices (optional)
- Hot sauce (optional)
Instructions
- Preheat the oven to 400°F (200°C). Arrange the taco shells upright in a baking dish.
- In a skillet over medium heat, cook the ground beef and diced onion until browned. Drain any excess fat. Add the minced garlic and taco seasoning, stirring for about 1 minute. Pour in the tomato sauce and let it simmer for 5 minutes.
- Spoon the seasoned beef mixture evenly into each taco shell. Sprinkle shredded cheese generously on top of the beef.
- Place the baking dish in the oven and bake for 10–15 minutes, or until the cheese is melted and the taco shells are crisp and golden.
- Remove from the oven and top the tacos with shredded lettuce, diced tomatoes, red onion, and cilantro. Serve warm with sour cream or guacamole.
Notes
Use lean ground beef for a healthier option. Customize with different proteins or toppings.
- Prep Time: 15
- Cook Time: 20
- Category: Main Course
- Method: Baking
- Cuisine: Mexican
- Diet: Non-Vegetarian
Nutrition
- Serving Size: 1 serving
- Calories: 350
- Sugar: 3g
- Sodium: 650mg
- Fat: 20g
- Saturated Fat: 10g
- Unsaturated Fat: 8g
- Trans Fat: 0g
- Carbohydrates: 30g
- Fiber: 2g
- Protein: 18g
- Cholesterol: 60mg
Keywords: cheesy tacos, baked tacos, comfort food